Friday, May 1, 2009

Step 3 - Rototill and soil conditioning

Now that the sod has been removed, it is time to condition the soil. We were fortunate to have help to get us the compost queued up and ready to go.

All of Palo Alto is considered a flood zone and, in fact, our street was badly flooded in 1998. As a result of being so low-lying, the soil is very silty clay. Clay makes for stable soil, but not great to growing lush gardens.

Jake, being the penny-miser that he is, was determined not to rent any expensive equipment to do this job. He foolishly thought that a shovel and some elbow grease would suffice. But smarter heads prevailed and he was talked into renting a rototiller by the wiser and more sore-prone neighbors. It was Saturday afternoon on Easter weekend when Brandy called Redwood Rentals in Redwood City. She called to confirm availability and price ($17.50/hr with 2 hr min or $80/day) and we decided to go for it. But, because it was after 2PM and they were closed Easter Sunday we realized that we didn't have enough time to do a complete job and get the equipment back before closing. Brandy called back to offer $50 for us to return the machine at 830AM Monday. Chad said yes - so it was a go. Thanks, Chad!

The rototiller worked wonders! Jake was so delusional to think that he could have approximated this effort with a shovel, rake, and hoe. It was well worth the $50 spent and twice as much could easily have been justified.

This process is best accomplished with three or four people.
The process was this:
First, run over the entire area with the tiller to break up and turn the soil to at least 8 inches, preferably 10-12.

From Chabot Terrace Community Garden


Then, using a wheel barrow to place loads of compost throughout the area, use the tiller to turn the piles of compost into the soil.
Two people moving compost, one person running the tiller and one person alternating with a shovel and rake to keep the soil evenly distributed over the area.
From Chabot Terrace Community Garden


From Chabot Terrace Community Garden


The tiller is quite effective at both moving soil and turning it over, when you get the hang of the operation.

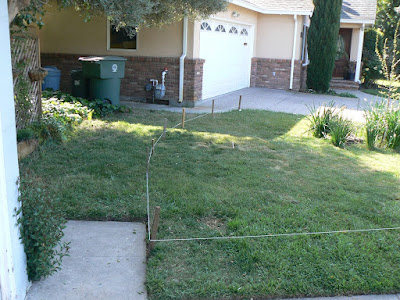
Next: Installing a border!

Thursday, April 30, 2009

Step 2 - Compost Acquisition and Sod Removal

COMPOST

We live in Palo Alto, which likes to take care of its residents. Since they have their own dump (euphemistically called a "Recycling Center"), they create their own compost. Several times in the spring and summer they have compost give-away days. We swooped on a timely Sunday give-away and, with a little help from our next-door neighbor, we acquired almost two cubic yards of compost for nothing more than a few hours' labor. We dumped in on the driveway in preparation for our soil conditioning step.


From Chabot Terrace Community Garden


SOD REMOVAL

After we had agreement on the garden footprint, it was time to remove the grass.

We explored two ways of doing this: 1) Use a shovel to dig straight down and just turn the soil upside down or 2) Use a shovel or hoe to dig under the sod, parallel to the ground, to cut the sod off the top.

Although Jake had it in his mind that method 1) was more efficient, the ladies (Jyoti and Brandy) showed him that method 2) was better. This is primarily because method 1) requires several steps (dig, turn, separate soil from roots, throw sod away) whereas method 2) just required two steps (remove sod, throw away).

This was a laborious step and it took a couple of days to get it done.

From Chabot Terrace Community Garden


Incidentally, we were left with over two cubic yards of sod to dispose of. Although it is possible to compost it, the sheer volume of it prevented us from being to process it any time within the next couple of years. We filled our greenwaste container with sod (which made a small dent in the overall pile), muscled it out to the sidewalk and hoped the collection services would take it. We kept our fingers crossed, knowing that they wouldn't have to lift it (it was probably between 200-300 lbs) since their trucks are mechanized for the greenwaste. They took it, but they left a note that the material didn't comply for two reasons: 1) the material is not compostable (I dispute that claim) and 2) it was too heavy. So from now on we will have to get rid of the sod in small piles at the bottom of the greenwaste. No problem, since we all know that compost is 1/3 dirt and 2/3 compostable material (just like sod!).

Here's a shot of the area with the sod removed and clue as to what the next step is!

From Chabot Terrace Community Garden

Step 1 - Size-up and Planning

So, where did this crazy idea come from anyway? It's something that has been on Brandy's mind and heart for quite a few months, perhaps even years. To say she has a green thumb would be an understatement and now that we have three kids, food choices have been something we both consider seriously almost every day.

Jake had the idea last year to remove the sod to the right of our driveway, but it seemed unrealistic at the time. We thought about it more over the time since then and, with the recent pummeling of the economy, there has been talk in the media remembering the "Victory Gardens" from WWII. The ideas spurred us on.

We have great relationships with our neighbors:
  • Right across the street is a wonderful Indian family whose culinary convictions are aligned with the Ayurvedic diet. When one cooks food in the Ayurvedic style, it is vegan, organic, and only fresh. They have often shared with us many wonderful and exotic dishes after dinner and guests. Their young boy is a playmate of all three of our kids which makes the relationship more consistent. Since she is a culinary instructor and has a strong interest in the purity of her ingredients, they are a natural partner in this effort to bring out food from the earth.
  • Next door is a great older couple that has been growing strawberries and tomatoes for years. They have agreed to sacrifice a little of the grass on their side of the property line and also allow use of their lawn irrigation to install a drip system for plants on their side.
  • Other neighbors are showing interest, but not necessarily participating. We fully expect that as the plants grow, the interest will grow with it, especially with a total of 9 kids on our small street.
So we decided, after conferring and getting commitment from our two closest neighbors, to go for it.

We started by stringing line on the ground to lay out the sod that would be removed. We left it up for over a week to get a sense of how it would feel to walk around it every day. As a result, we adjusted the side on our neighbor's lawn to accommodate more room for getting in and out of the car.

From Chabot Terrace Community Garden


From Chabot Terrace Community Garden


Next update - Sod removal!

Wednesday, April 29, 2009

Kicking it off

Ok, so this will be a blow-by-blow on the creation of our little community garden.

WHAT: We ripped out a section of lawn and replaced it with a garden. It was done on the front lawn, on a section that was adjacent to our neighbor. We got buy-in from our neighbor to support the garden from creation to maintenance. We also enlisted the help of neighbors across the street to pitch in.

WHY: We want to eat local and organic. We can't imagine a more local food source than 15 feet outside out front door! A side benefit is a garden is infinately more interesting than a patch of grass. With our three young kids, interesting is more than just the opposite of boring - it's education!

HOW: For as little $$ as possible. All aspects will take cost first into account, followed closely by an evaluation of safety and health. Aesthetics will also play a large role in the design and evolution of the garden. The goal is to create food with the lowest cost and impact on the environment. To that end, recycling, water conservation and minimal extras will be the controlling factors.

This blog will be a repository for all of our learnings, successes, failures and a documentary of the experience. We plan to include pictures, video, how-to guides and probably quite a few how-not-to guides as well.

We're off!

Jake and Brandy Olsen